
Installation Instructions for the RX 4 to 6 in

Effective: November 15, 2023

Introduction

Read all of the instructions before proceeding.

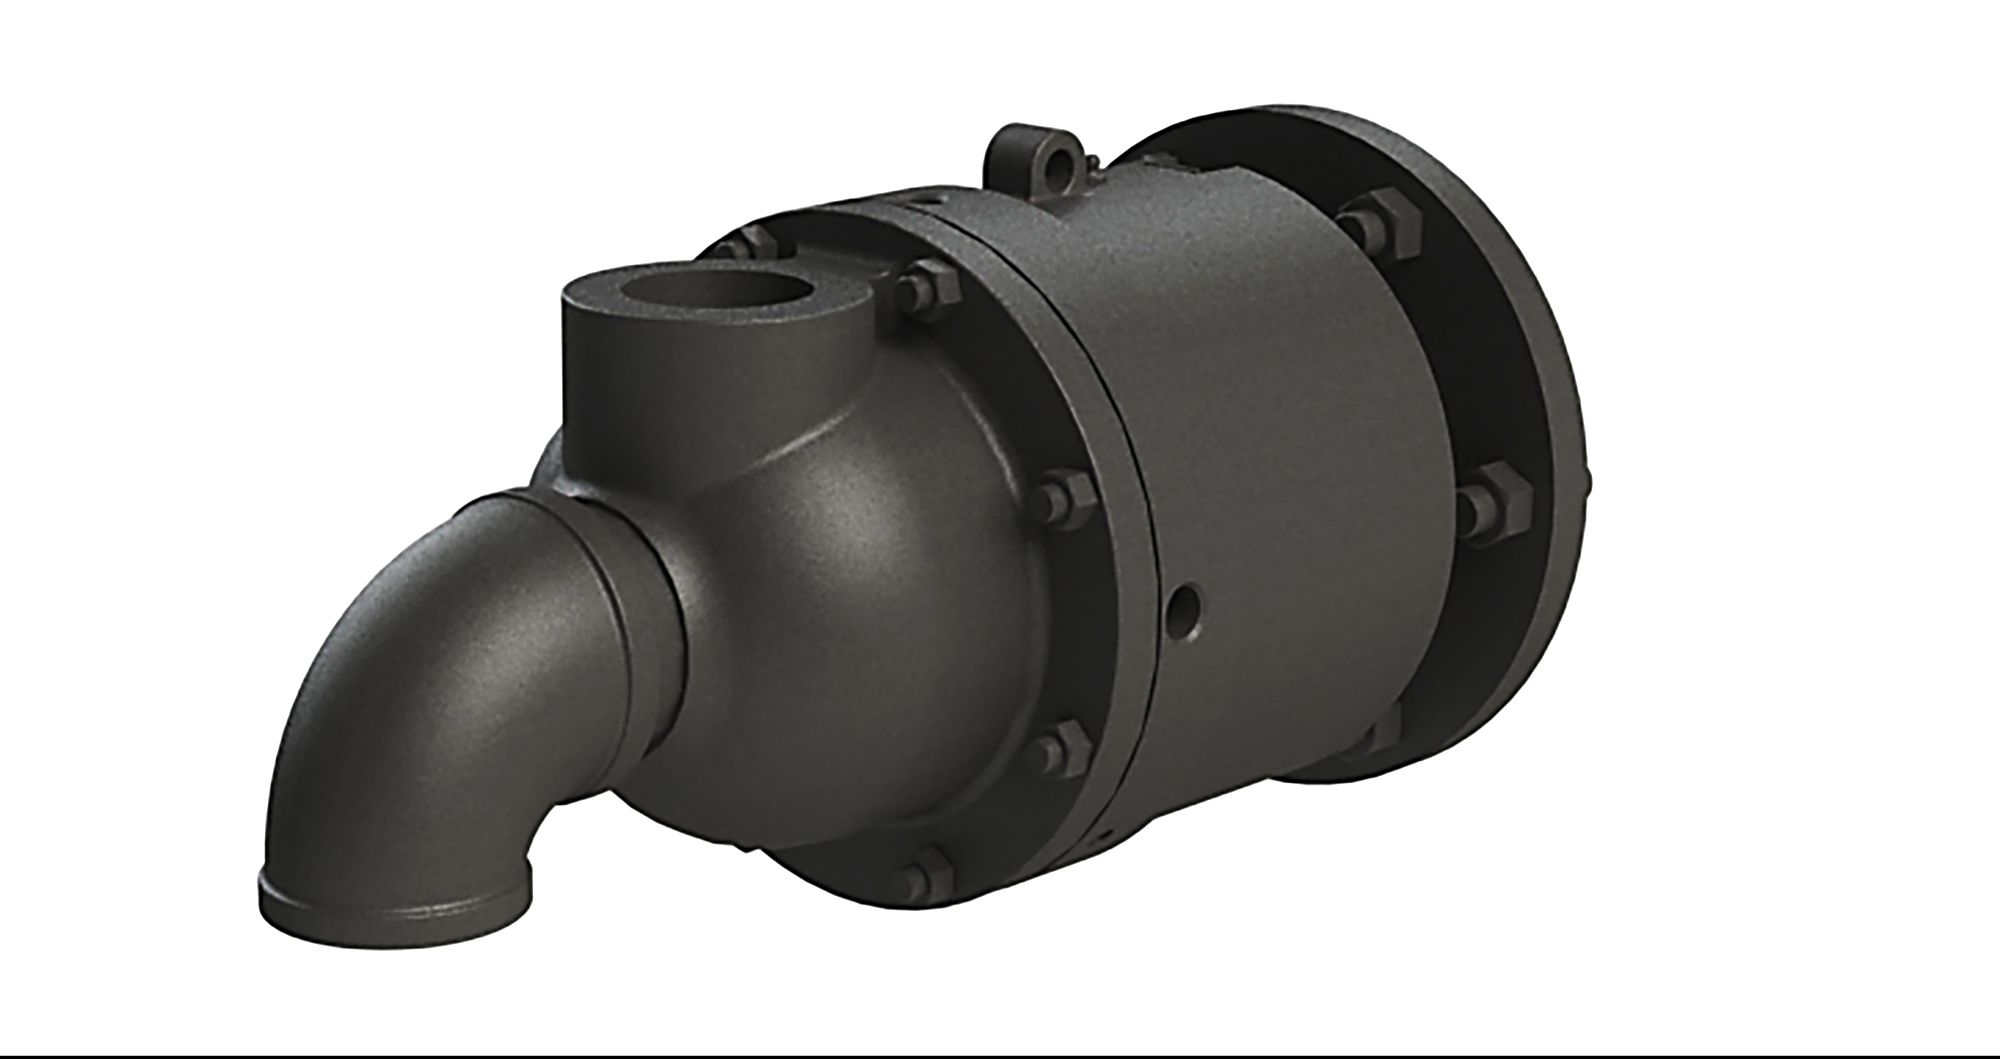
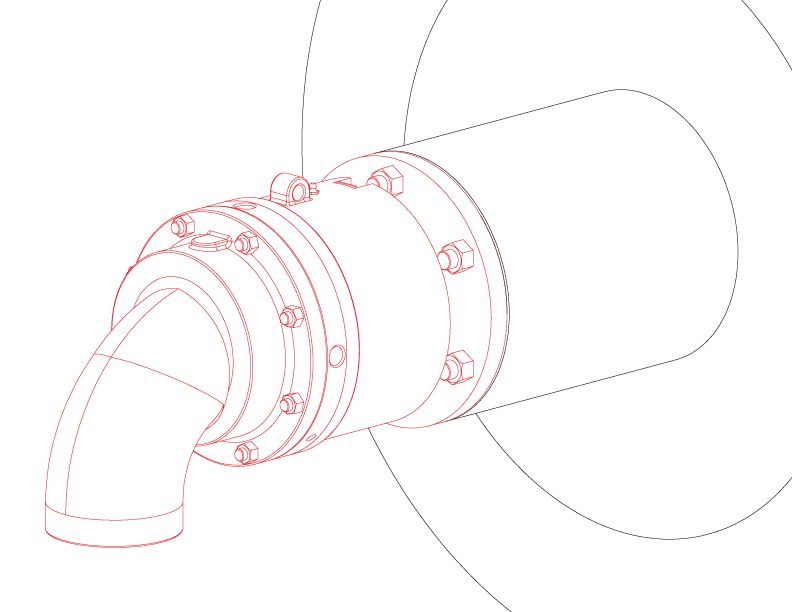
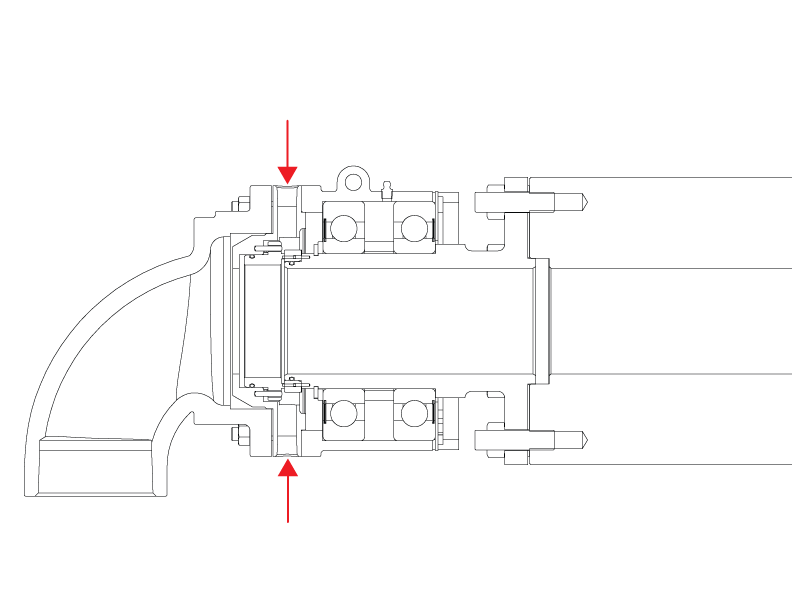
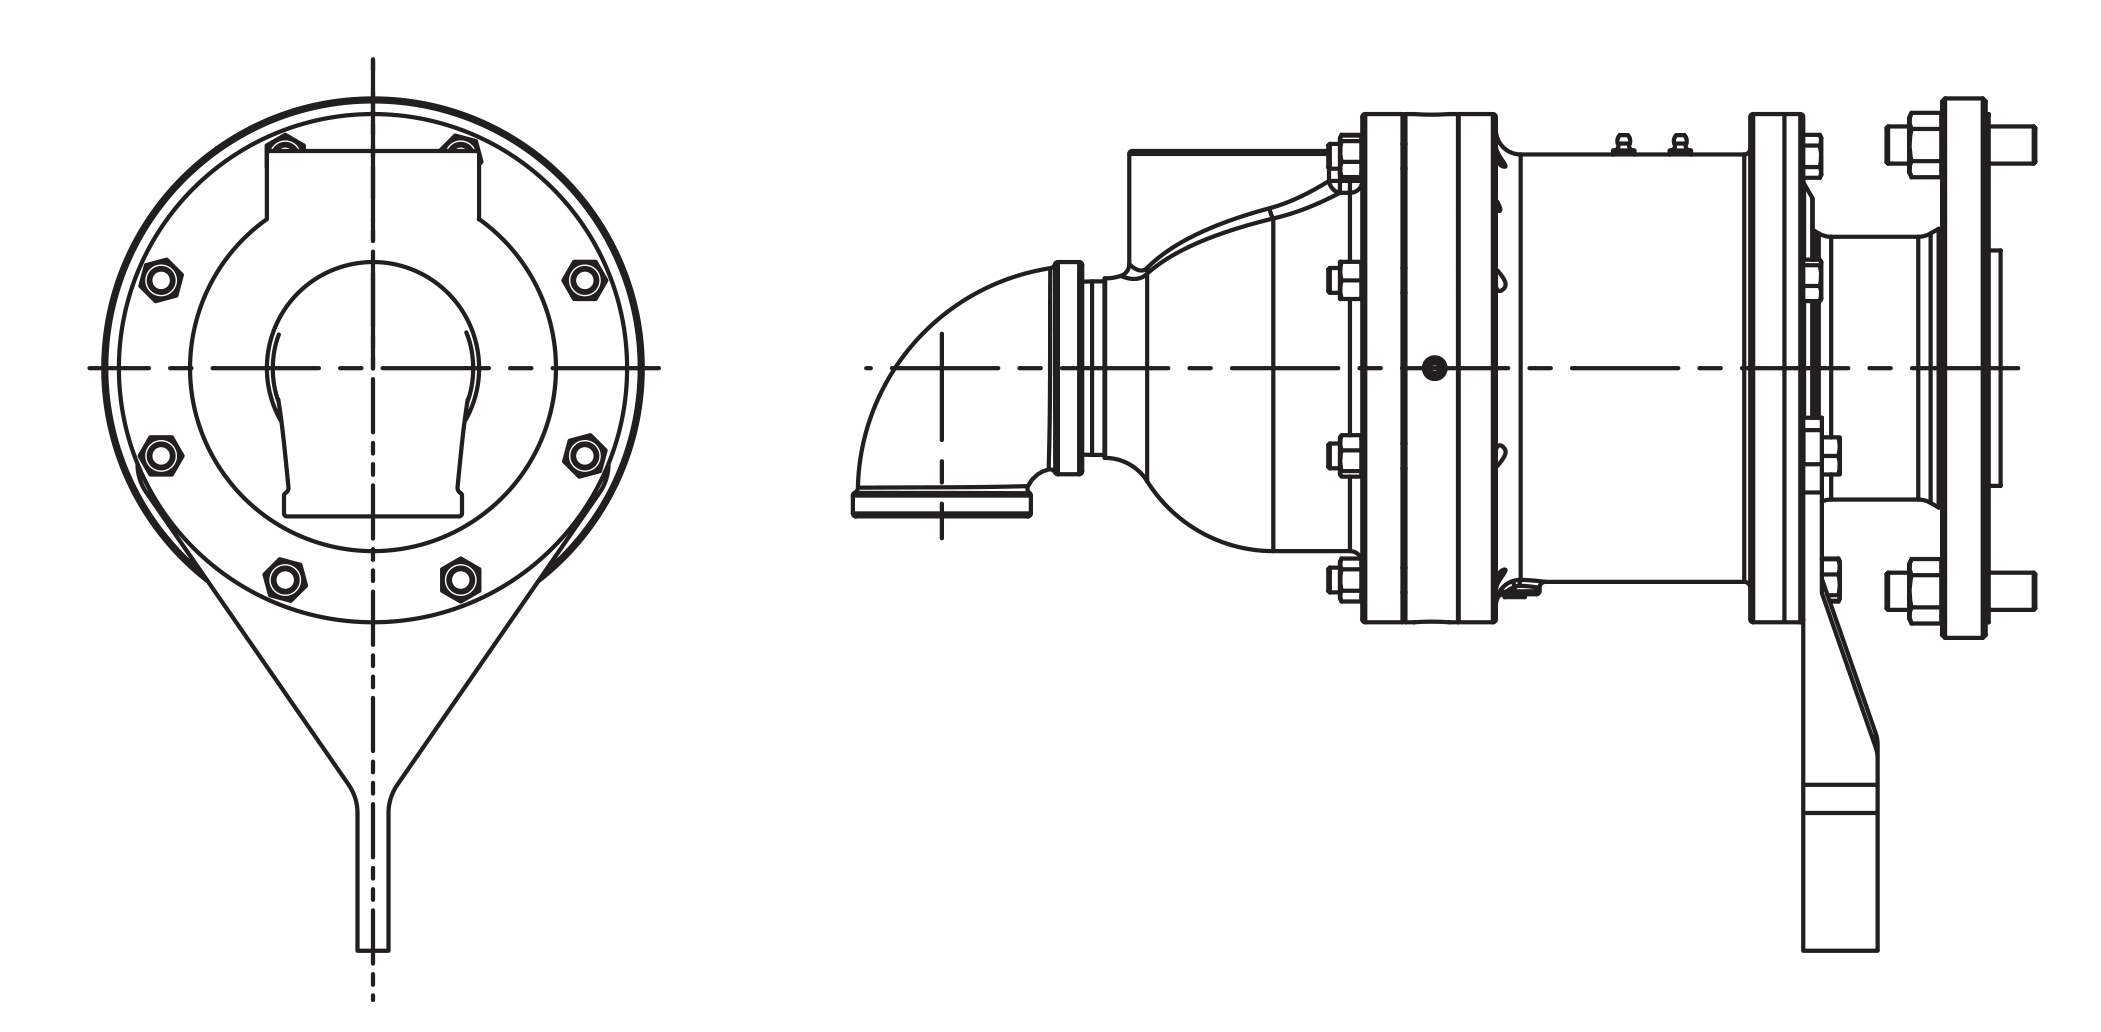
Refer to Kadant Johnson assembly drawing for part identification and to drawing A37640 for torque specifications. For easy identification, parts used in individual steps are often accompanied with their position in the assembly drawing [e.g. gasket (8B)]. Tighten all fasteners in a star pattern. Certified drawings are available upon request. Dimensions are for reference only and subject to change.

Safety

warning symbol

This safety symbol alerts you to risk of death or injury if the instructions are not followed. In all steps, death or injury may result if the machine is not de-energized, depressurized, cooled, and stopped. Death or injury may occur if the product is operated with a fluid type or at a pressure, temperature, or speed that do not meet its specifications. Death or injury may occur if heavy parts and pinch hazards are not handled properly. Follow your company’s safety procedures.

Step 1

Remove the existing equipment. If installing a new journal flange remove the existing and clean all sealing surfaces.

NOTE: There are two styles of RX rotary joints, single flow and dual flow. Skip to Step 2 for single flow and Step 3 for dual flow.

symbol

Equipment must be cool and free of pressure.

STEP 2, SINGLE FLOW

Place gasket on nipple flange. Lift the rotary joint up and slide over the studs on the journal. Secure with hex nuts.
symbol

Heavy object. Rigging or hoist is recommended.

STEP 3, DUAL FLOW

Place gasket on nipple flange. Lift the rotary joint up, slide over the supply pipe and slide over the studs on the journal. Secure with hex nuts.
symbol

Use caution during this step. Internal seals can be damaged.

symbol

Pay special attention to the length of the supply pipe. Excess length or a pipe that is short will cause the rotary joint to not function correctly.

symbol

Heavy object. Rigging or hoist is recommended.

Step 4

Pay special attention to concentricity. At high speeds the bearing will yield longer, trouble-free service if runout is kept to a minimum.

 
Joint Version Maximum Speed Maximum Runout
Standard Water 750 RPM 0.012" (0.304 mm)
-1 High End Water 750 RPM 0.012" (0.304 mm)
-2 Standard Oil 750 RPM 0.012" (0.304 mm)
-3 High End Oil 750 RPM 0.012" (0.304 mm)

Step 5

Connect the piping to rotary joint using rubber hose or Kadant Johnson flexible metal hose. Hose ratings must be able to sustain the media flow.
NOTE: Connections may be flanged or threaded.
IMPORTANT: Refer to Flexible Hose Installation.
Recommended Minimum Hose Lengths For Flexible Metal Hose
Pipe Size Minimum Length Static Bend Intermittent Bend Maximum Offset
2" 21" (533.4 mm) 5.00" 15" 2 1/8"
2 1/2" 22" (558.8 mm) 7.00" 14" 2 7/16
3" 24" (609.6 mm) 8.25" 17" 2 9/16"
4" 28" (711.2 mm) 11.00" 22" 2 15/16"
5 30" (762 mm) 11.00" 28" 2 1/2"
6" 33" (838.2 mm) 16.50" 33" 2 5/8"

Step 6

There are two vent holes located on the assembly plate (31). They provide an escape path in case the seal package leaks and also prevent fluid from flooding the bearing cavity. Ensure that one hole is positioned down. A flexible drain line may be attached if needed.
NOTE: The vent holes are 1/2" NPT

Step 7, BALL BEARING RX

This version has a torque lug located on the body for attaching a steel anti-rotation rod. The rod should be placed through the lug on the body and the opposite end affixed to a stationary bracket or framework. If two rotary joints are installed sided by side, they can use a common rod.

Step 8, TAPERED ROLLER BEARING RX

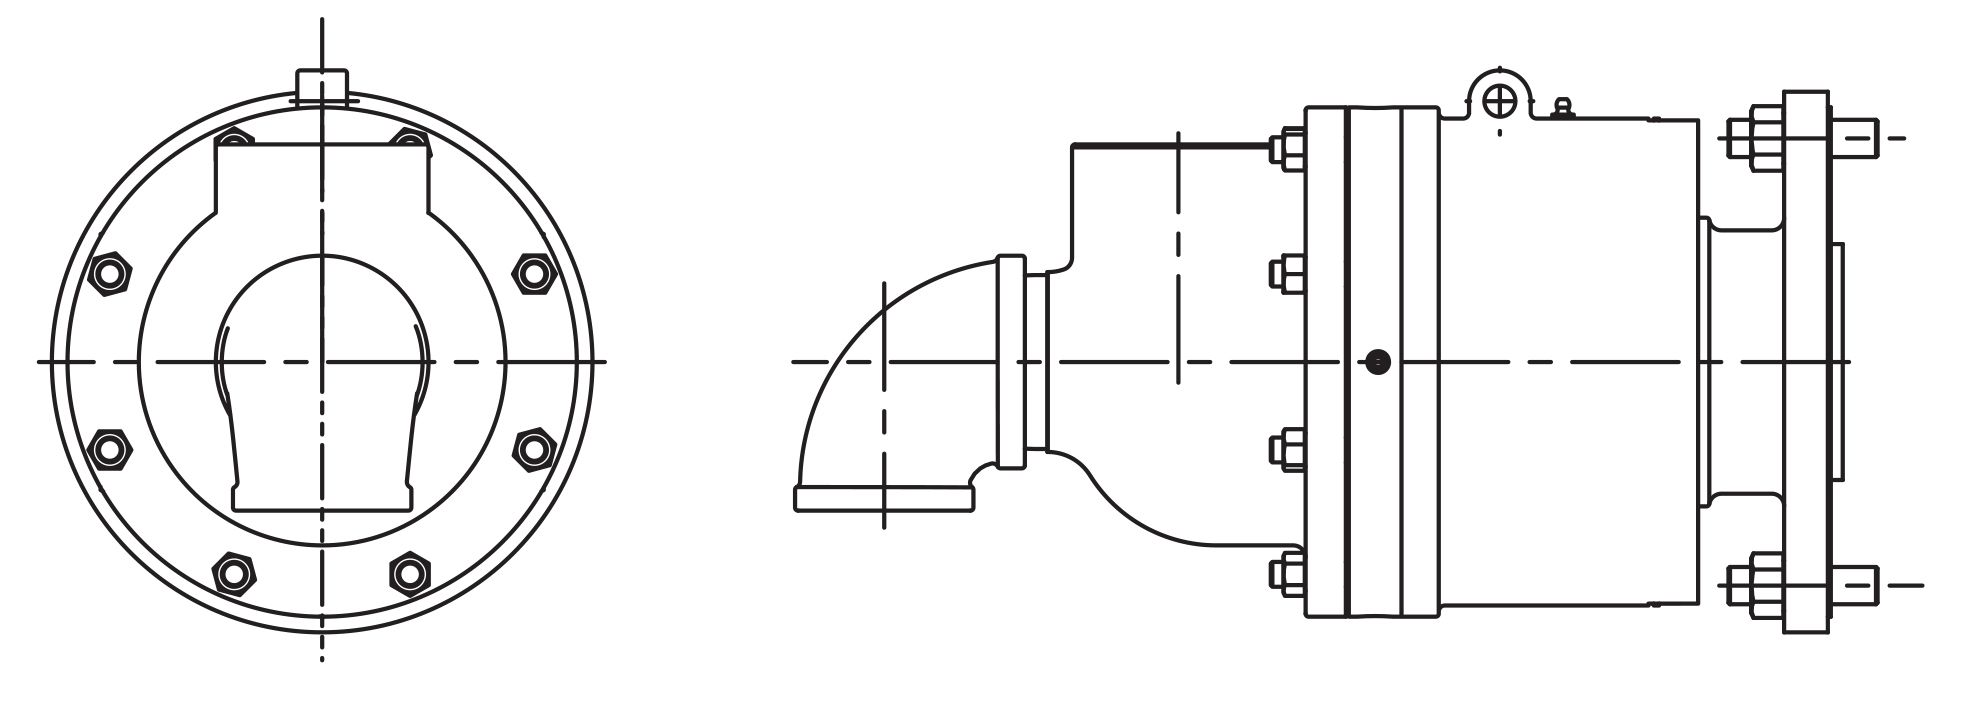
This version has a torque lug bracket bolted to the body. The bracket should be oriented to come into contact with a stationary bracket or framework. As the rotary joint rotates, the lug bracket prevents the body from rotating.


IS RX Single Flow 2" to 3"

The Kadant Johnson Warranty
Kadant Johnson products are built to a high standard of quality. Performance is what you desire: that is what we provide. Kadant Johnson products are warranted against defects in materials and workmanship for a period of one year after the date of shipment. It is expressly understood and agreed that the limit of Kadant Johnson’s liability shall, at Kadant Johnson’s sole option, be the repair or resupply of a like quantity of non-defective product.

Kadant Johnson rotary joints and accessories could be subject to European Pressure Equipment Directive 2014/68/EU (PED). Modifications or changes to rotary joints and/or accessories are only permitted upon approval of Kadant Johnson. Only genuine Kadant parts and original accessories will ensure the safety of these assemblies. The use of other than original parts voids the warranty and will lead to forfeiture of the declaration of conformity and will invalidate any liability for damages cause thereby.